How to install Yoast SEO for WordPress
Thank you for choosing Yoast SEO for WordPress for your website! In this article, we’ll explain how to install the Yoast SEO plugin on your WordPress website. If you want to use Composer, we have a separate manual on how to install Yoast plugins using Composer.

Free or Premium?
Please note that this is the installation manual for the free Yoast SEO plugin. Want to install Yoast SEO Premium? Use the Yoast SEO Premium for WordPress installation manual instead!
Table of contents
How to install Yoast SEO for WordPress video tutorial
How to install Yoast SEO for WordPress
To install the free Yoast SEO for WordPress plugin on your WordPress site, follow the steps below.
- Log in to your WordPress website
When you log in, you will be in your Dashboard.
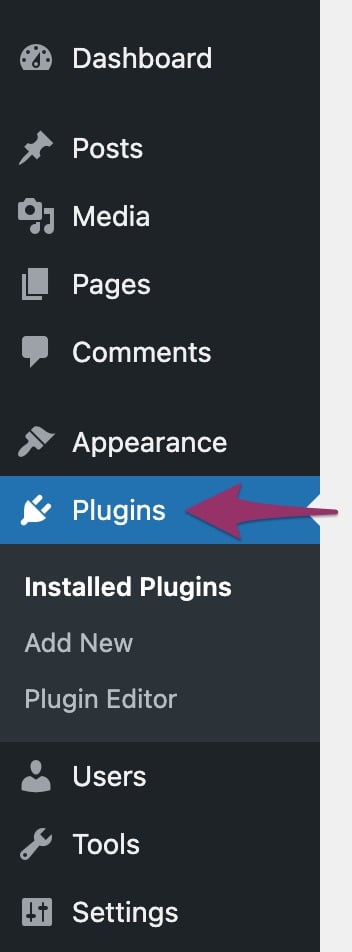
- Click on Plugins in the menu on the left
The Plugins settings will expand. Click on Add New.
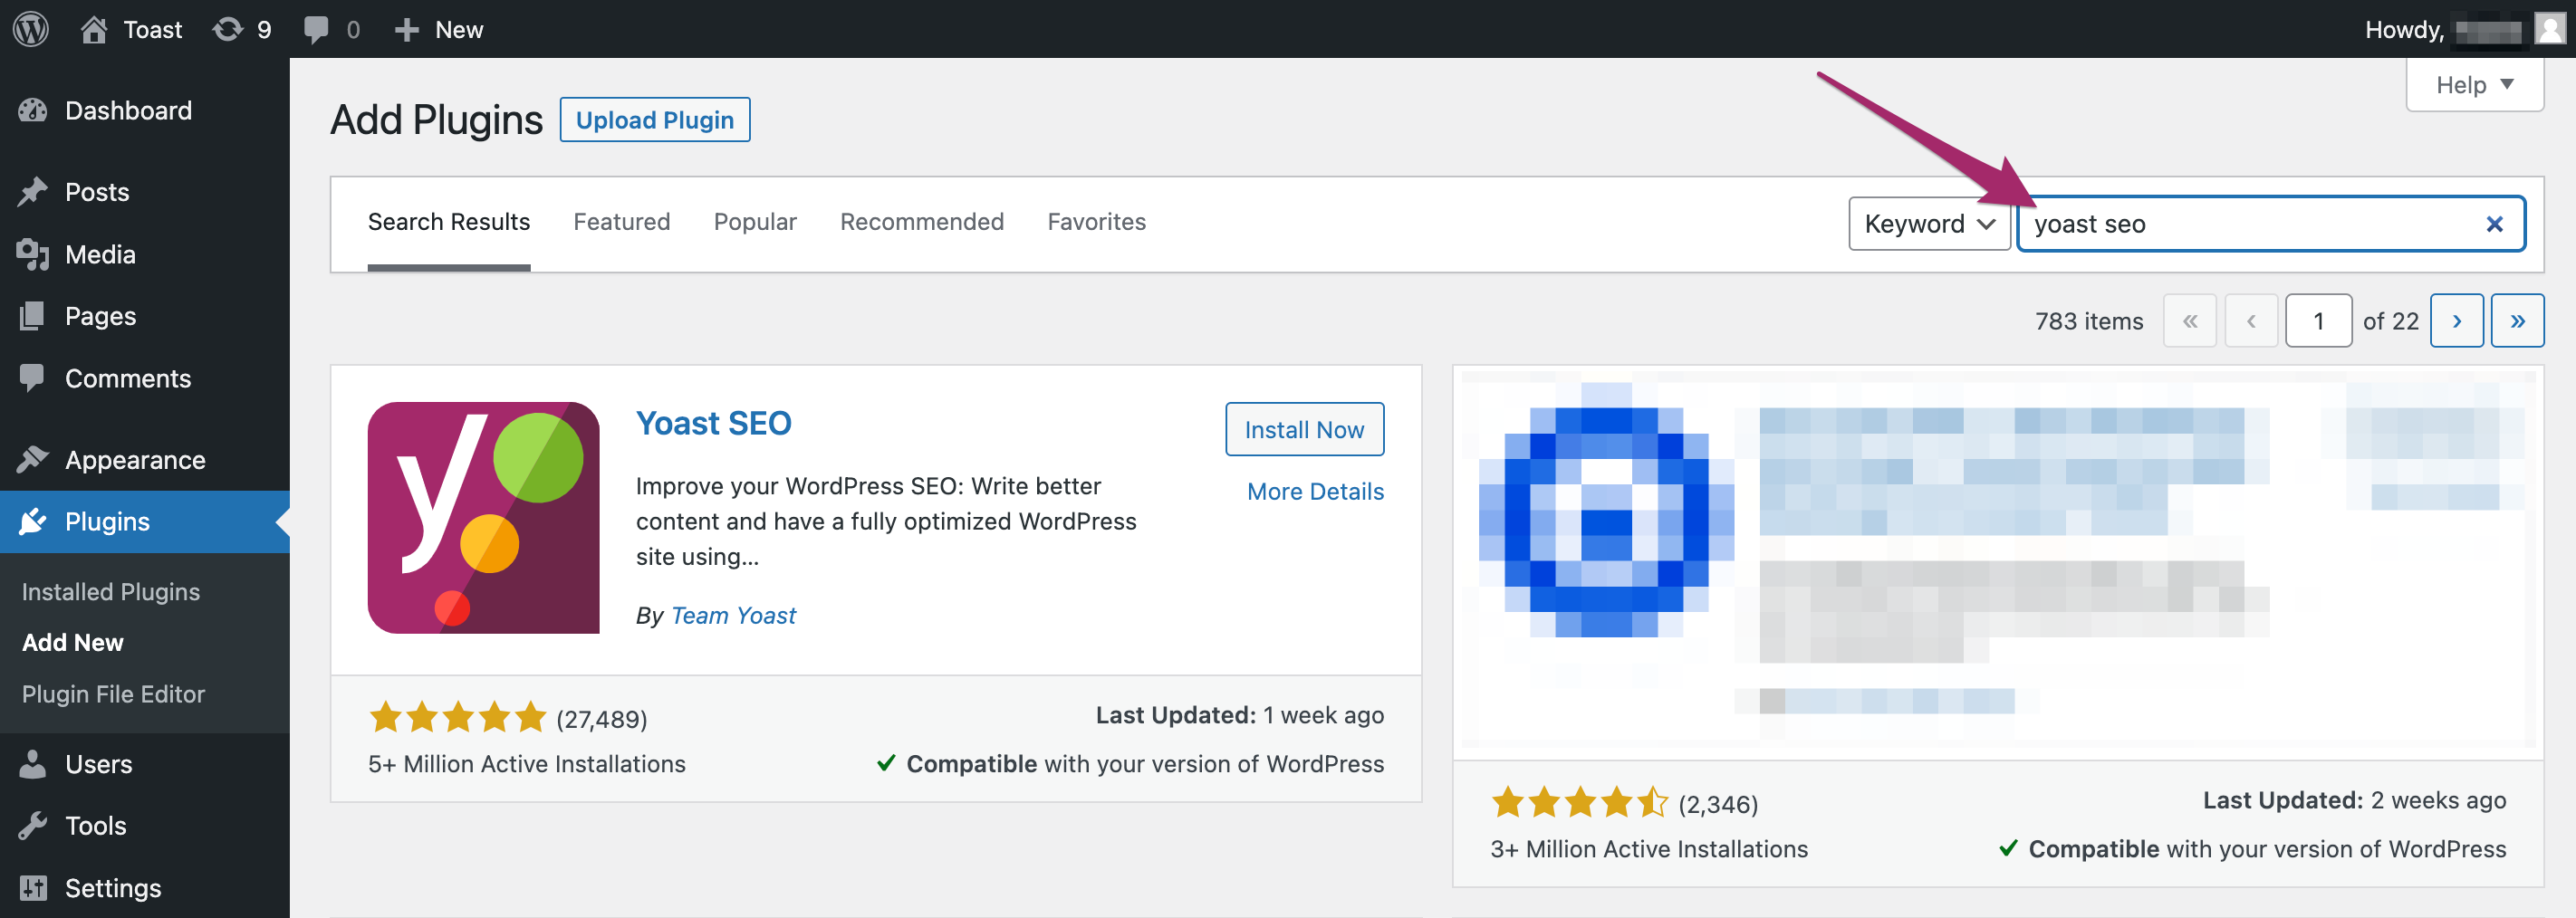
- Search for Yoast SEO
In the search bar, search for Yoast SEO.
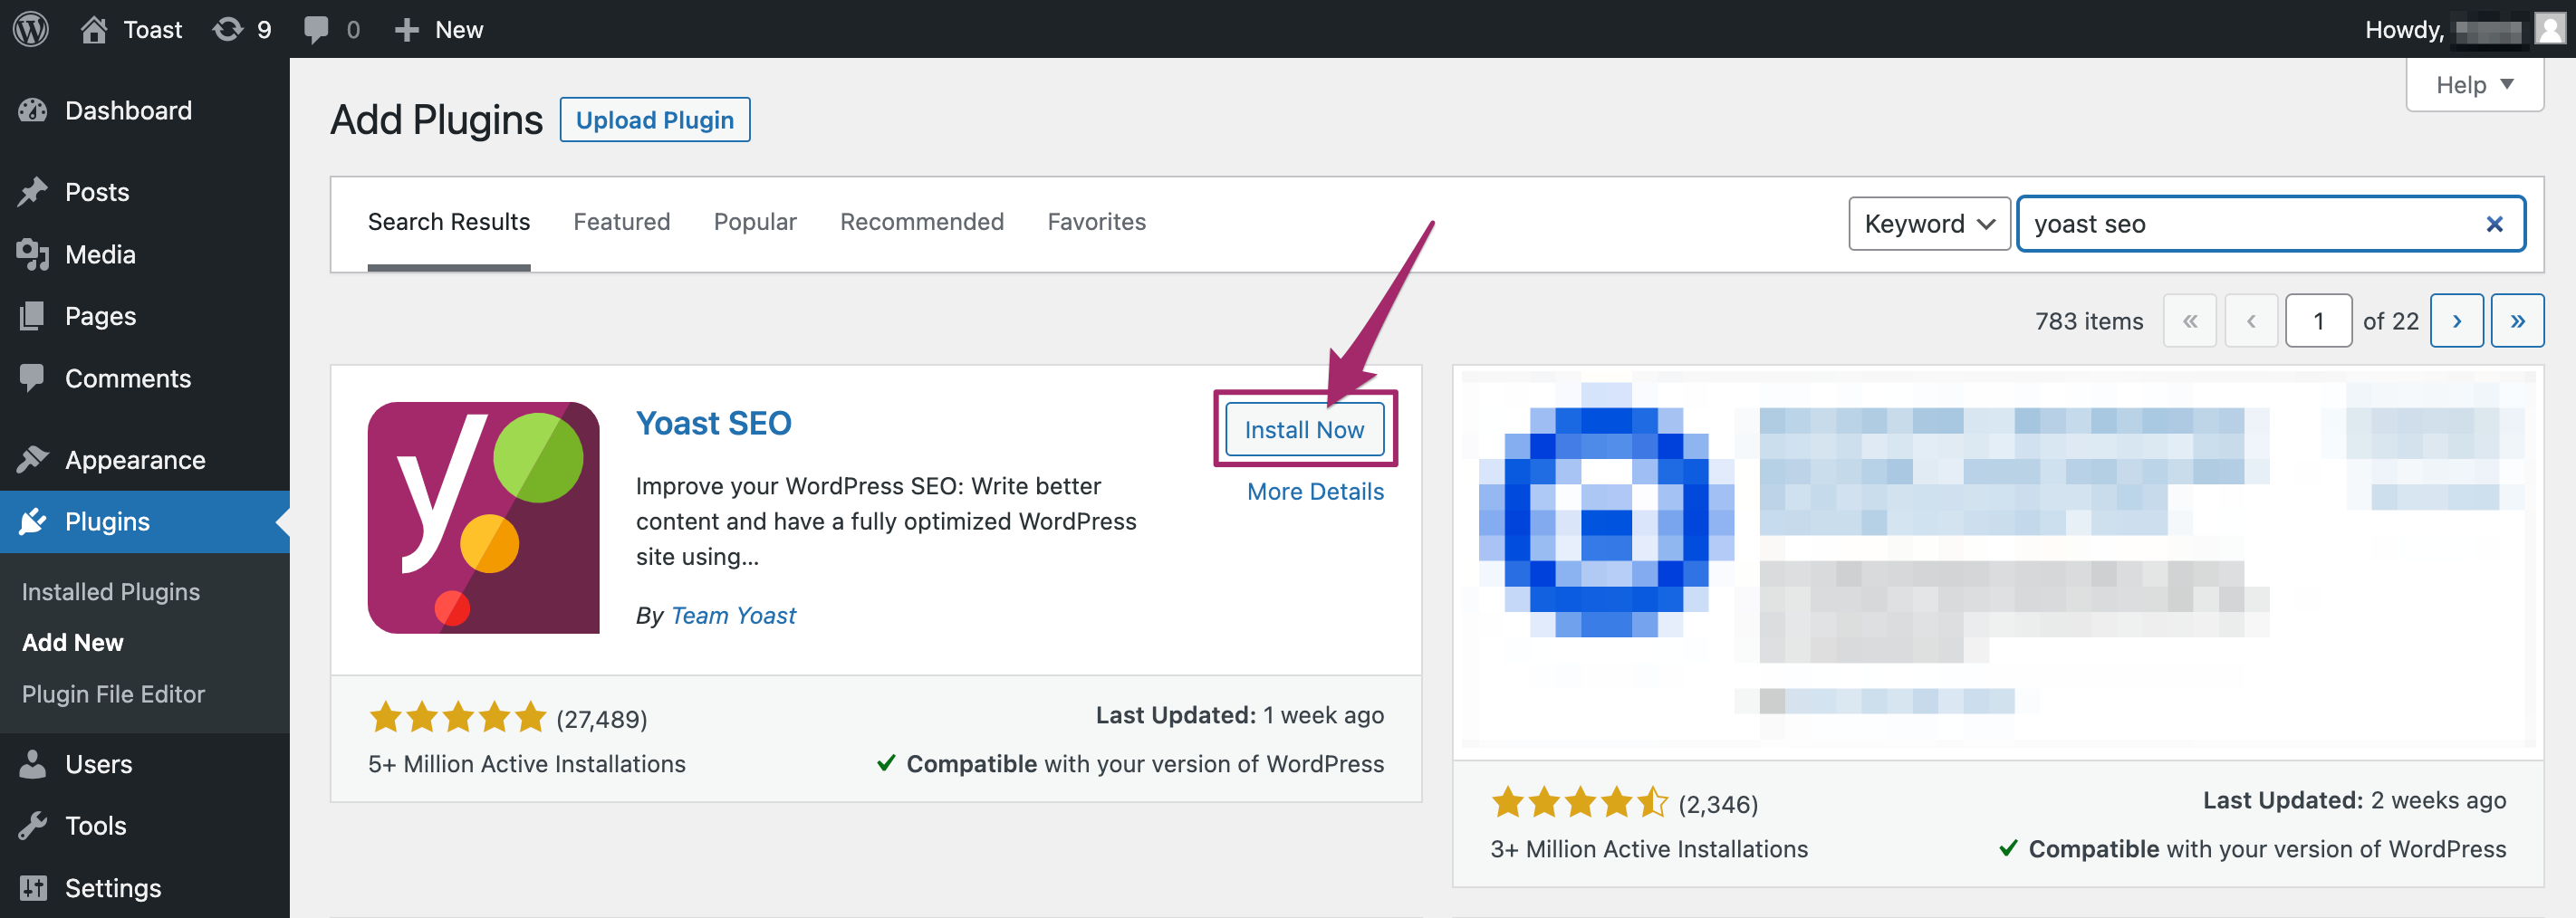
- Click Install Now
Click the Install Now button of the Yoast SEO plugin to start the installation.
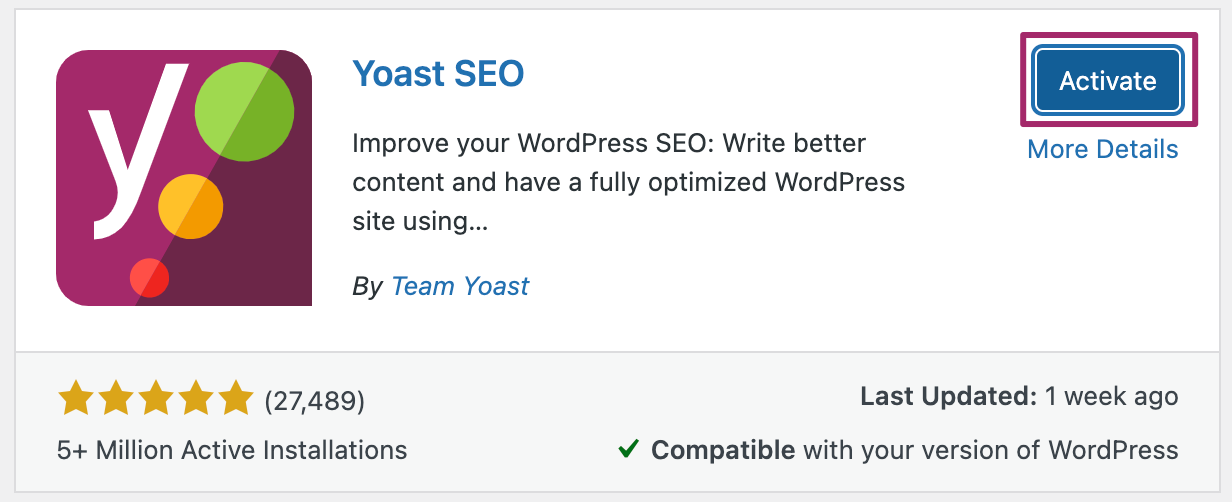
- Activate the plugin
Once the installation has finished, click the Activate button.
- Congratulations on installing the Yoast SEO plugin!
You can now go and configure the plugin.
I have an error installing the Yoast SEO plugin
If you run into problems installing the Yoast SEO plugin, please consult our Common installation and update errors help article.
Related articles

Get Local SEO for WordPress plugin
Make your website stand out in your local area and boost your online presence.