How to install Yoast SEO Premium for WordPress
Thank you for purchasing Yoast SEO Premium! In this article, we’ll explain how to install the Yoast SEO Premium plugin, both automatically and manually. If you want to use Composer, we have a separate manual on how to install Yoast plugins using Composer.

Free or Premium?
Please note that this is the installation manual for Yoast SEO Premium. Want to install the free Yoast SEO plugin? Use the Yoast SEO for WordPress installation manual instead!
Table of contents
How to automatically install Yoast SEO Premium
To install Yoast SEO Premium to your WordPress site, follow these steps.
- Go to the MyYoast installation page
You will find this page right after you complete the checkout process; you can also visit it at any other time.
- Enter your site URL
You can either add a new URL or choose an existing one that you’ve already added to your MyYoast sites.
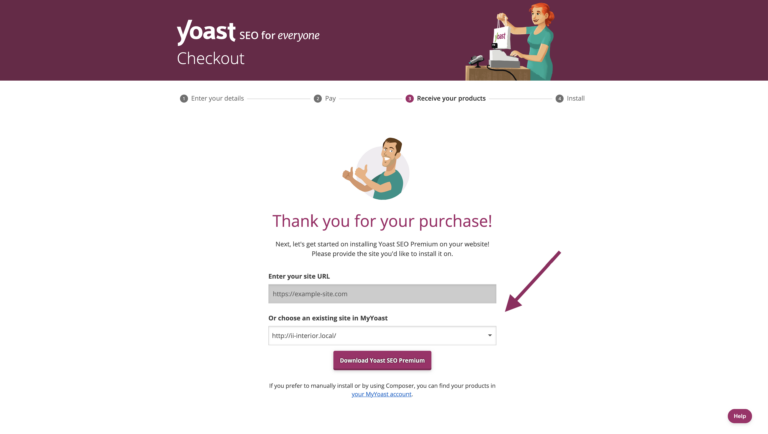
- Click on Download Yoast SEO Premium
The .zip plugin will either automatically save to your downloads folder, or you can select another folder.
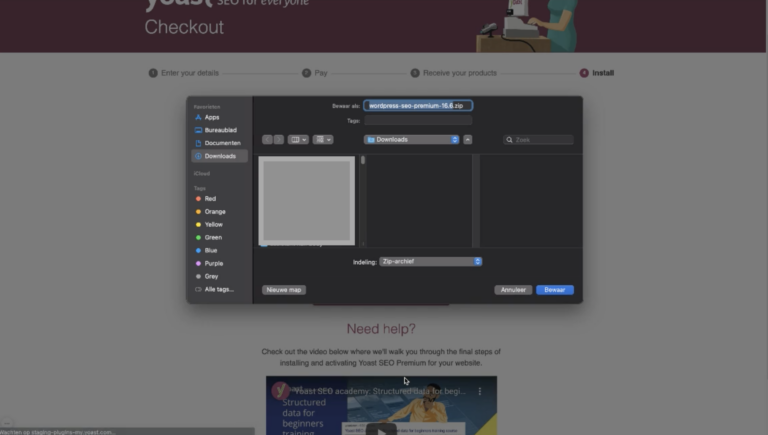
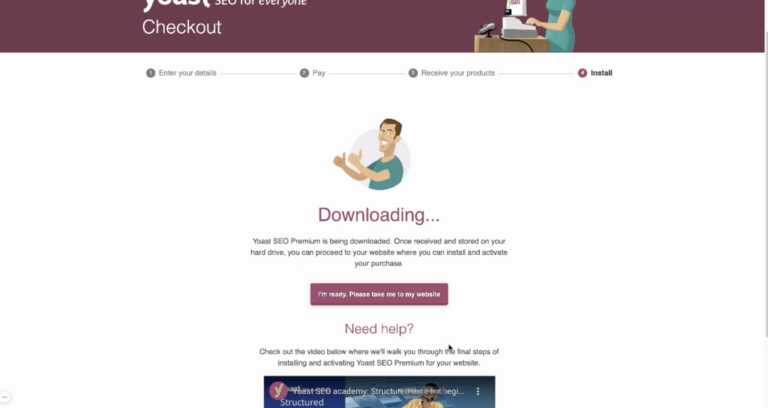
- Click on I’m ready. Please take me to my website
You will automatically go the backend of your website, where you’ll land on the Add Plugins screen in WordPress. If you are not logged into your site you will need to log in first.
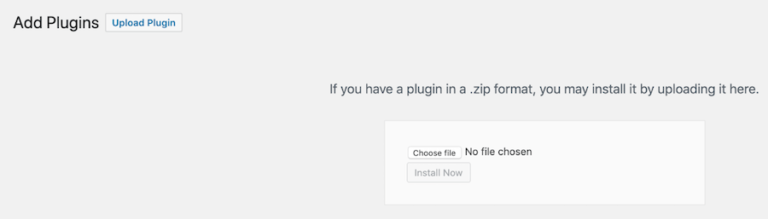
- Upload the plugin .zip and click Install Now
In the Add Plugins screen, you can click on Choose file and upload the .zip file. You can also drag the downloaded .zip from your download folder to the Choose file field. Click on Install Now to install the plugin; this may take some time.
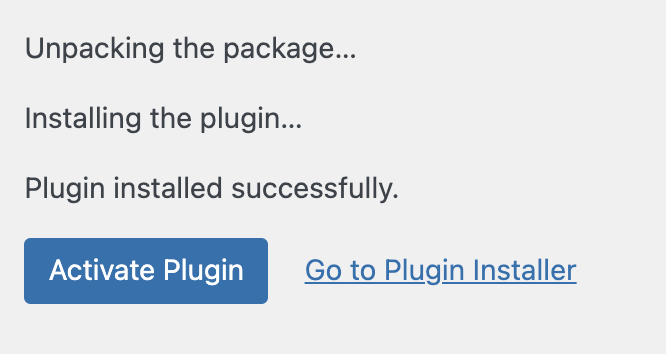
- Click Activate Plugin
When the plugin is installed, you will see a new screen that shows you the installation status. Click on Activate Plugin to complete your installation.
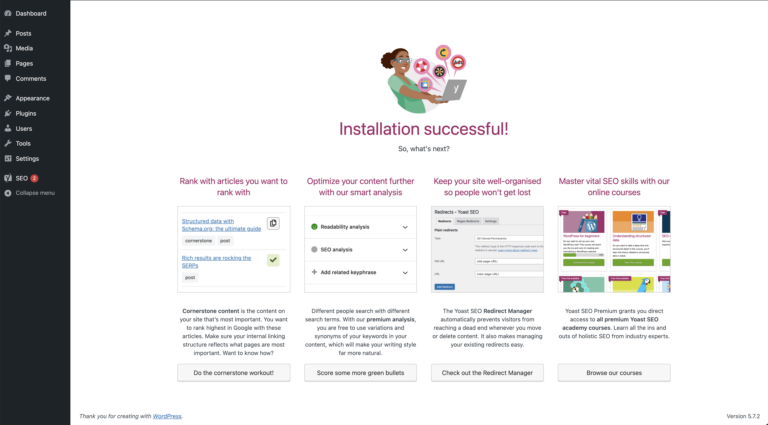
- Enjoy using Yoast SEO Premium!
Yoast SEO Premium is now active on your site. You will be taken to the screen that confirms that your installation was successful. Here, you can start optimizing your SEO, for example by doing the Yoast SEO Premium internal linking workout.
How to manually install Yoast SEO Premium
When you want to manually install Yoast SEO Premium, you need to download the plugin; install the plugin; and connect your subscription. Follow the steps below for the installation manual.
- Go to MyYoast and click on Downloads
Log into your MyYoast account, and click on Downloads in the menu to view all your Yoast products.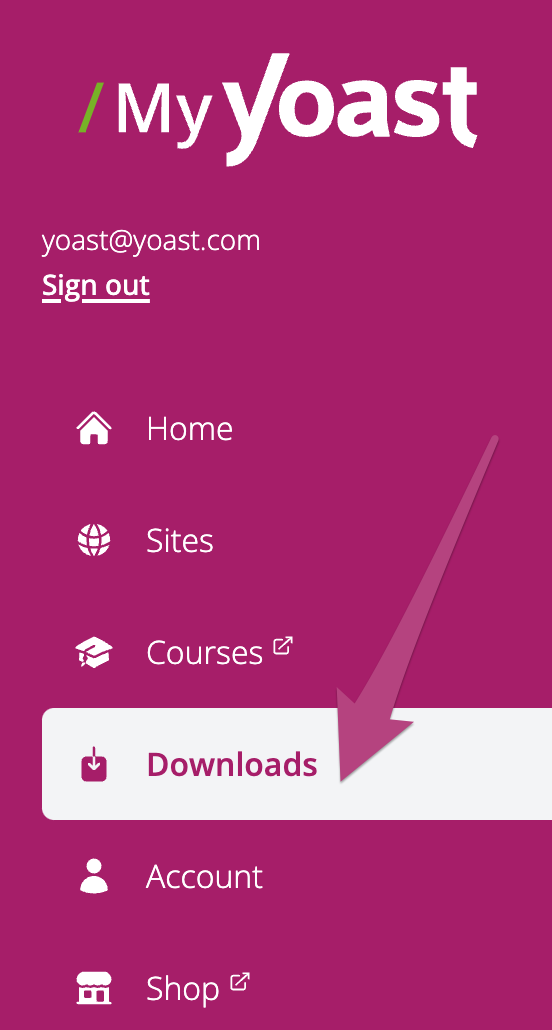
- Download Yoast SEO Premium
Click the Download Yoast SEO Premium button. The .zip plugin will either automatically save to your downloads folder, or you will be asked to select where you want to save your plugin.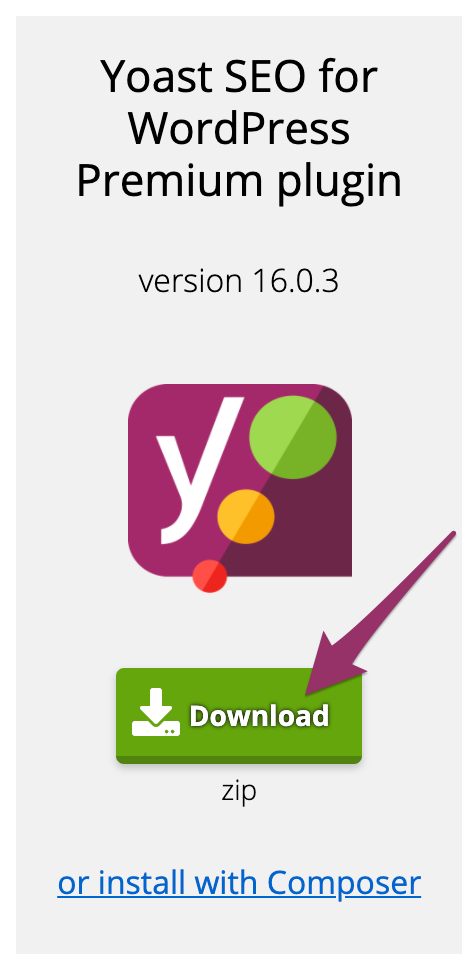
- Log in to your WordPress website
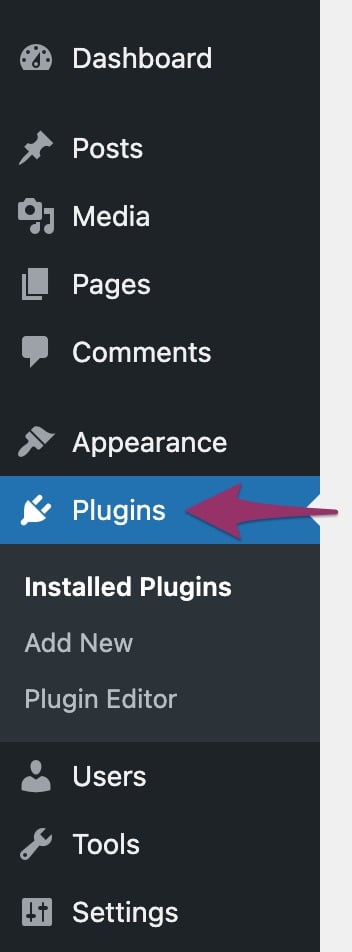
When you log in, you will be in your Dashboard. - Click on Plugins in the menu on the left
The Plugins settings will expand.
- Click Add New
A new screen will open. If you don’t see the Add New option, check that you have the right permissions to install plugins on the site. If you are in a multisite environment, please install the plugin through the network admin under My Sites> Network Admin>Plugins.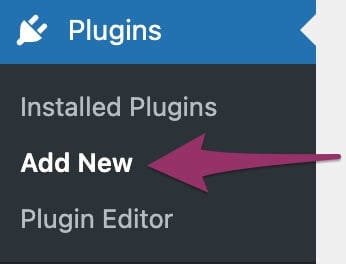
- Click the Upload Plugin button at the top of the screen
The screen will expand with the option to upload files.
- Upload the plugin and click Install Now
In the Add Plugins screen, you can click on Choose file and upload the .zip file. Click on Install Now to install the plugin; this may take some time.
- Click Activate Plugin
After installing the plugin, click on Activate Plugin to complete the installation. If you have a multisite installation, this button will be labeled Network Activate: click it to complete the multi-site installation. - Go to MyYoast and click on Sites
Return to your MyYoast account, and click on Sites in the menu to view and add your sites.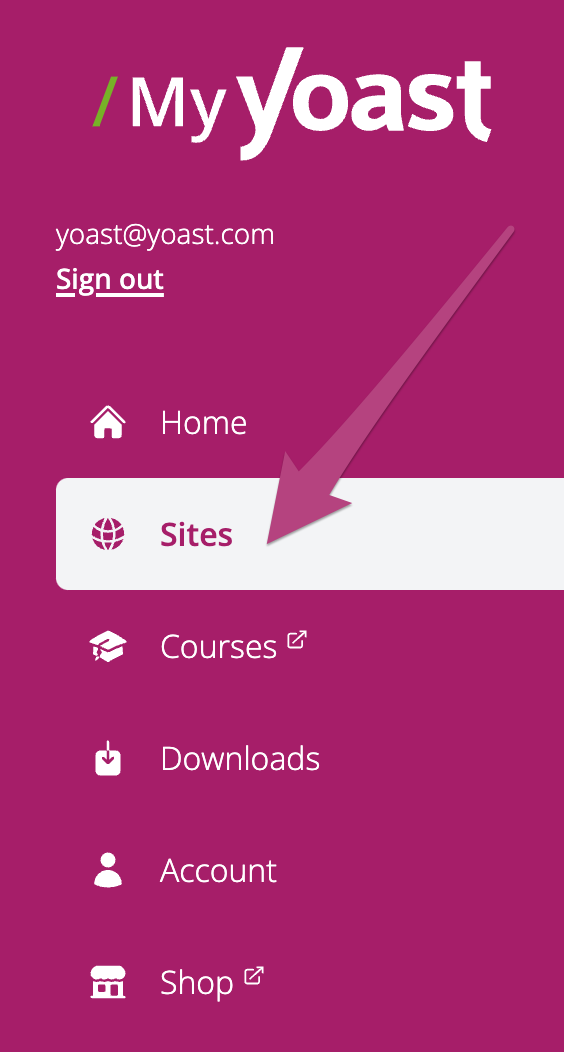
- Add your site
Click on + Add site to add the URL of your site, and select what platform your website runs on. Click on Add to complete this step.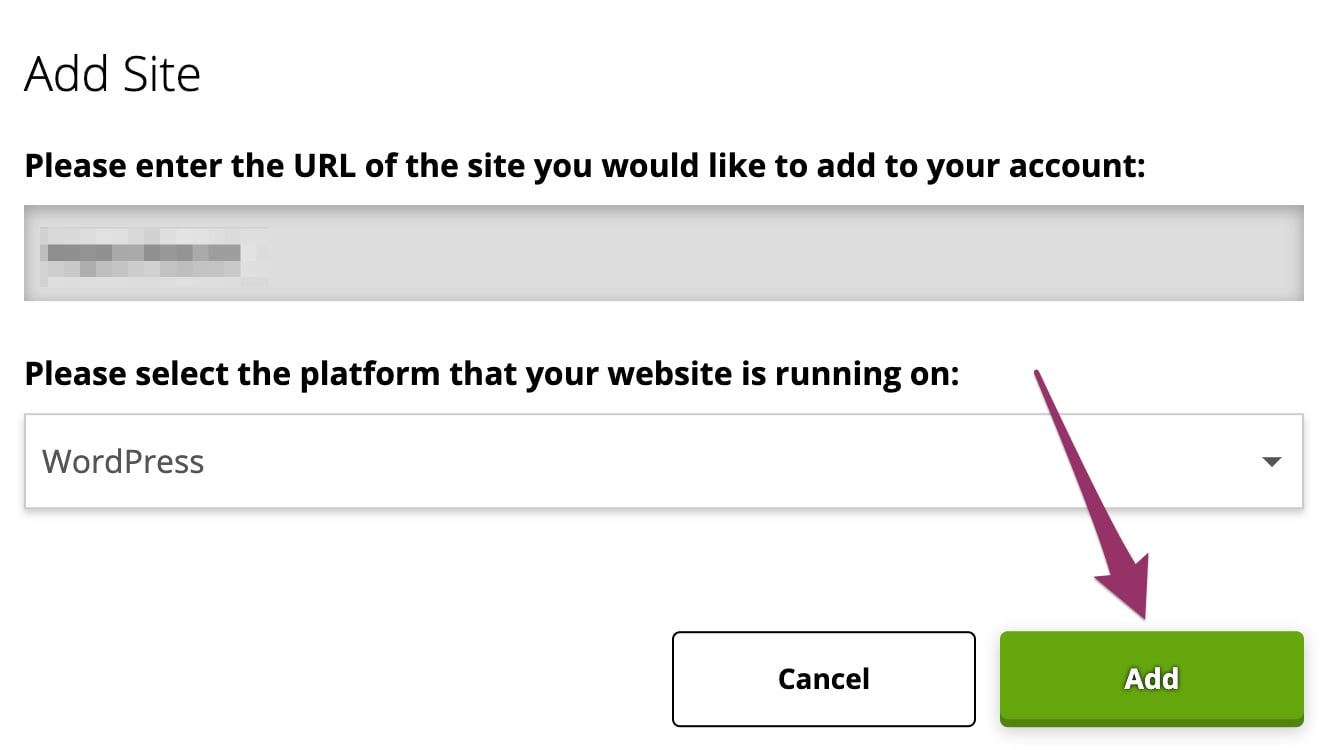
- Connect your subscription
Your site is now added to the sites overview. Clicking the Manage button takes you to your site overview. Here you can enable your subscription by switching your toggle to On, as shown in the image below.
- Congratulations! You have now installed and activated Yoast SEO Premium on your site!
You now have access to all the Yoast SEO Premium features, so you can start optimizing your SEO.
How to install Yoast SEO Premium for TYPO3 using Composer
Want to install Yoast SEO plugins for TYPO3 with the help of Composer? Follow the steps below for the installation process.
- Go to MyYoast and click on Downloads
Log into your MyYoast account, and click on Downloads in the menu to view all your Yoast products. - Click on Install with Composer for the specific Yoast plugin
Click on Install with Composer to open the menu for creating a developer token
- Click on Create token to create a developer token
To register your token, add the Yoast secure repository and install the plugin, click on Create token.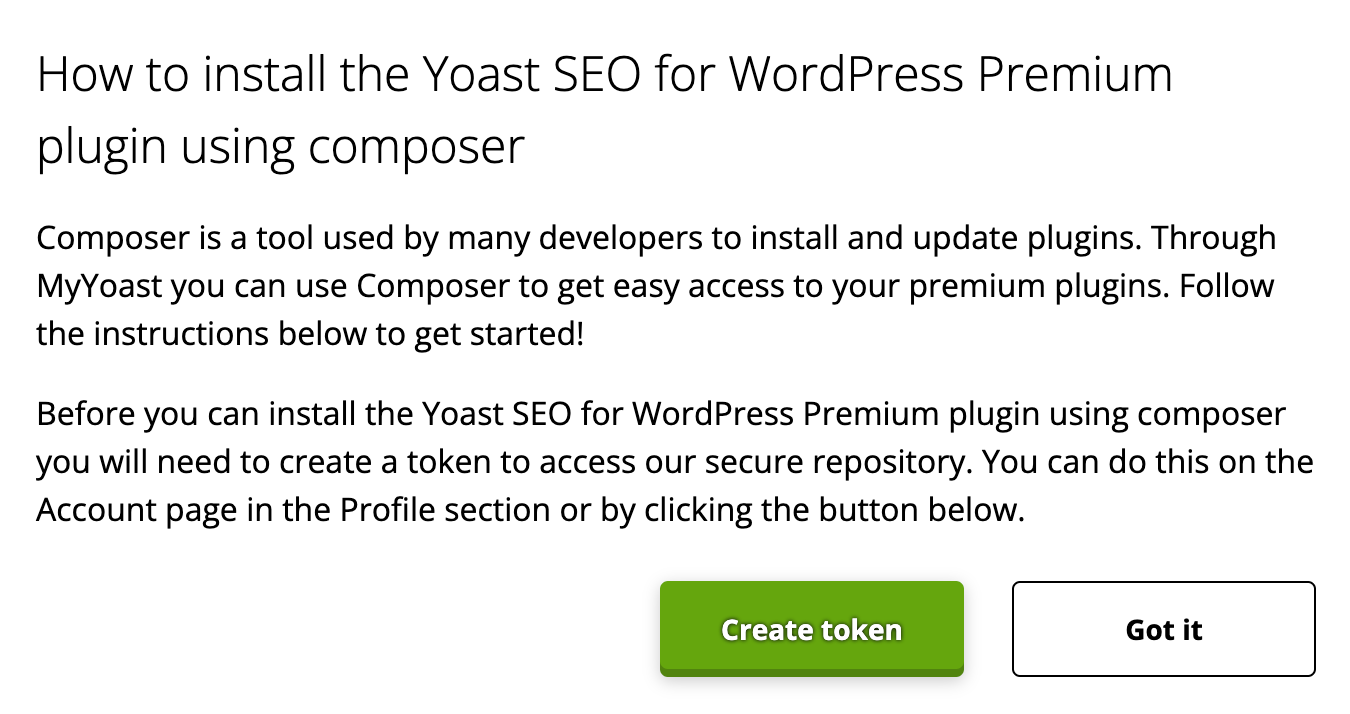
- Register your token
On the command line, go to the folder that holds yourcomposer.jsonfile and enter the following:composer config -g http-basic.my.yoast.com token [PASTE_YOUR_TOKEN] - Add the Yoast secure repository
Add our secure repository by adding the following:composer config repositories.my-yoast composer https://my.yoast.com/packages/ - Install the Yoast SEO plugin
Now you can install the plugin using:composer require yoast-seo-for-typo3/[yoast_seo_premium] - Congratulations! You have now installed your Yoast SEO plugin of choice
You can start optimizing your site for SEO immediately!
I have an error installing Yoast SEO Premium
If you run into problems installing Yoast SEO Premium, please consult our Common installation and update errors help article.
Related articles


Get Yoast SEO Premium
Drive more traffic to your site. Use AI to save time doing SEO tasks. Make SEO easier. And get 24/7 support.